
This is the first post in a new blog category for D365 and the Power Platform, it will hopefully follow the same format as my D365FO blog. For the first post I wanted to take a look at Power BI and how to successfully create a connection to an API that requires authentication and then consume the data returned.
Create Azure App Registration
The first thing we have to do is to determine how we want to authenticate to our endpoint. Some endpoints are anonymous and don’t require any authentication but most will require some sort of authentication. In our example we use Azure AD as our authentication source which requires us to set up an Azure app registration. This setup is slightly outside the scope of this blog post but here is some documentation around this process.
Quickstart: Register an application with Microsoft Identity Platform
Microsoft Identity Platform and OAuth 2.0 Authorization Code Flow
Get URL To Request Data
The next thing we need to do is determine the URL that we need to query to get the data. Depending on what sort of API you are trying to get data from will dictate how you go about determining the URL you need to point your Power BI query to. If the API is controlled by a 3rd-party or ISV they may have documentation around consuming their APIs. Another option is to open up the developer tools within your web browser and look at the requests being made on the page to determine this information. In the example below, I am using the Fastpath application that I am a developer on and I can see that when I run a report a POST request is sent to a specific URL.

The Headers tab will show you the parameters of the request being sent in, and the Response tab will show you the results coming back from the API.
Use Advanced Editor to Create Query
So how do we consume this data from the API within Power BI? The first thing to do is to launch Power BI and go to Get Data -> Blank Query.

This will open the Power Query Editor, right-click on your query and go to Advanced Editor, the dialog that appears will allow you to write a custom query to be executed. The language used by Power BI when creating a custom query is Power Query.
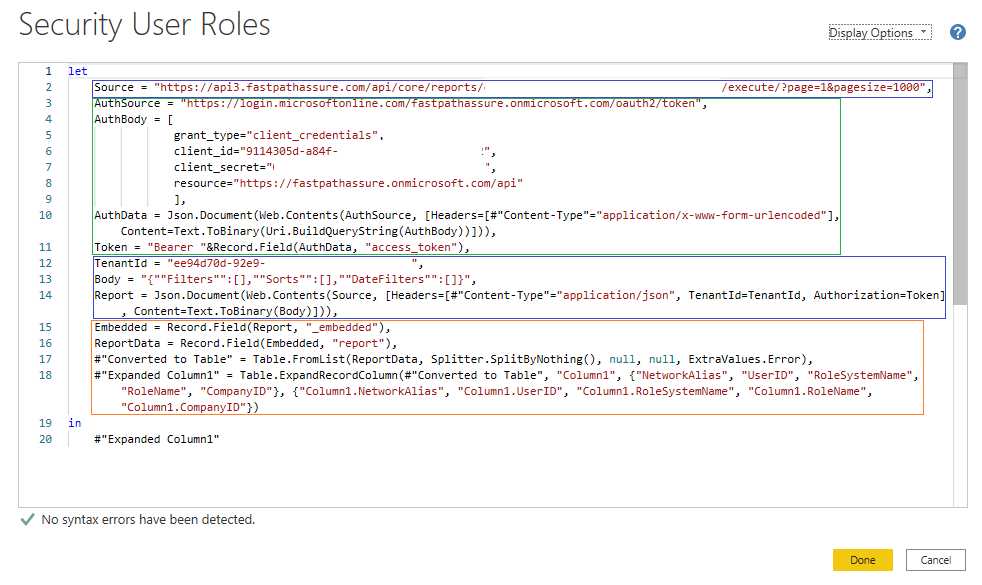
This language was new to me but was fairly straightforward syntax and the documentation around the different functions was very easy to find. Below is the initial query I came up with, let’s go through which each part does.
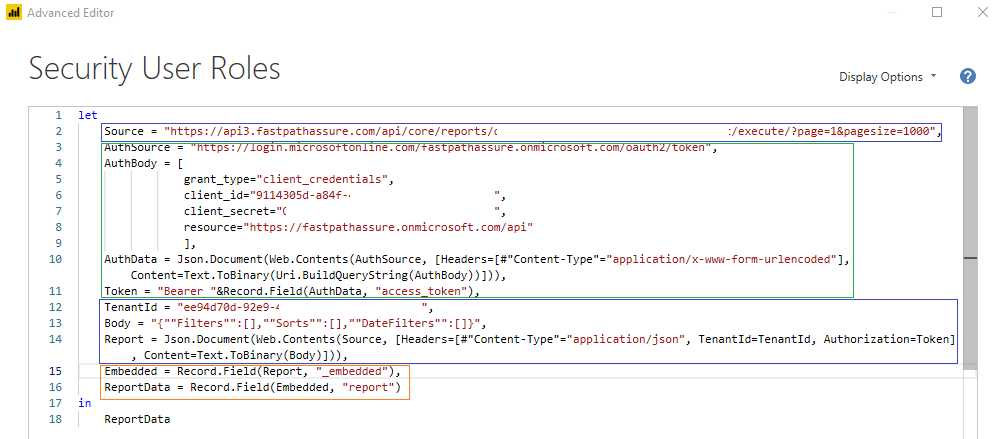
The green box is the logic needed for getting an authentication token. In our case, we use login.microsoftonline.com which is utilizing Office365/Azure AD to gain our authentication token. This endpoint is well documented and it requires:
- grant_type
- client_id
- client_secret
- resource
This information is created as part of the Azure App Registration. There are a couple different points I wanted to make here:
- This HTTP request is required to be a POST, by default Power BI will perform an HTTP GET request. So to get this request to change we have to add the Content=Test.ToBinary() option
- The AuthBody parameter will contain many different letters, numbers, and symbols and not all of these symbols will be valid to be sent via an HTTP request. Which means we have to encode them which is what the Uri.BuildQueryString() method does.
The blue boxes are the code needed to actual obtain the HTTP response from the endpoint. One thing to note here is that we have the ability to create HTTP headers parameters, which are required for our endpoint. We have to include:
- Content-Type
- TenantId
- Authorization (token from previous step)
This request was also a POST request so we used the Text.ToBinary() method again.
The orange box is logic needed to traverse the HTTP response to get to the actual data. In this case, the HTTP response object returned had the actual report data under the JSON object _embedded/report.
Transforming Report Data
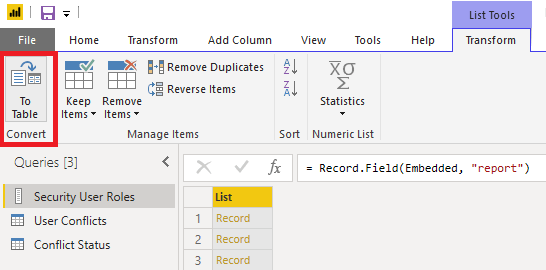
If we execute this query, we can see that the data is successfully pulled but is not in a format that is able to be consumed by Power BI just yet. We need to actually break apart the Record object to show the individual columns of the data we are pulled back. The first step is to do a Convert -> To Table
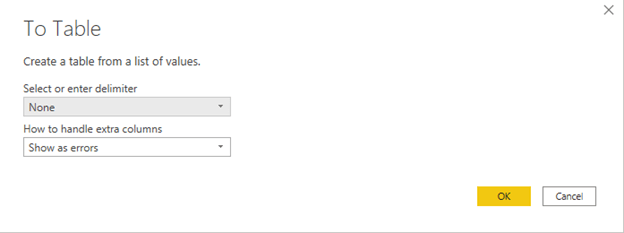
You then have the ability to tell Power BI how this data is delimited. In our case, we didn’t have to modify the these options.
Now that we have successfully converted the data to a table, we can click on this button at the top of the columnn which expands the Record object to show each column of the record.
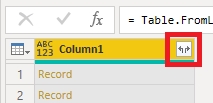
Once clicked you can see the columns that Power BI found in your data, in our case we selected all columns.
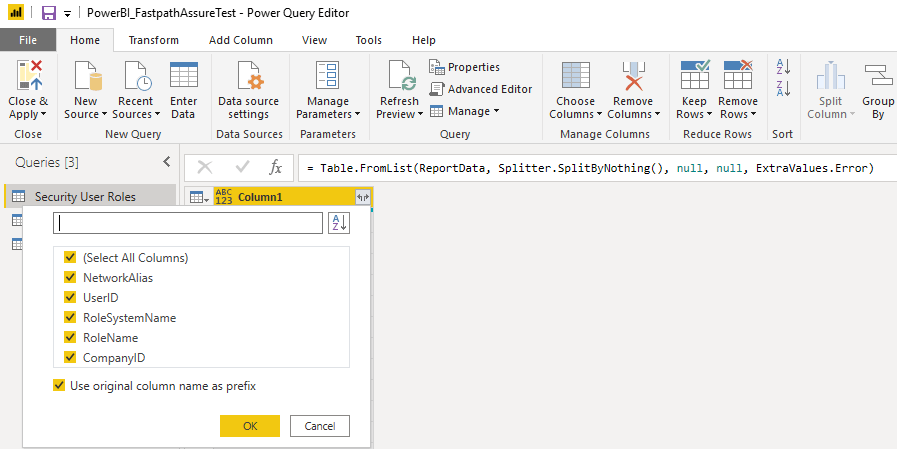
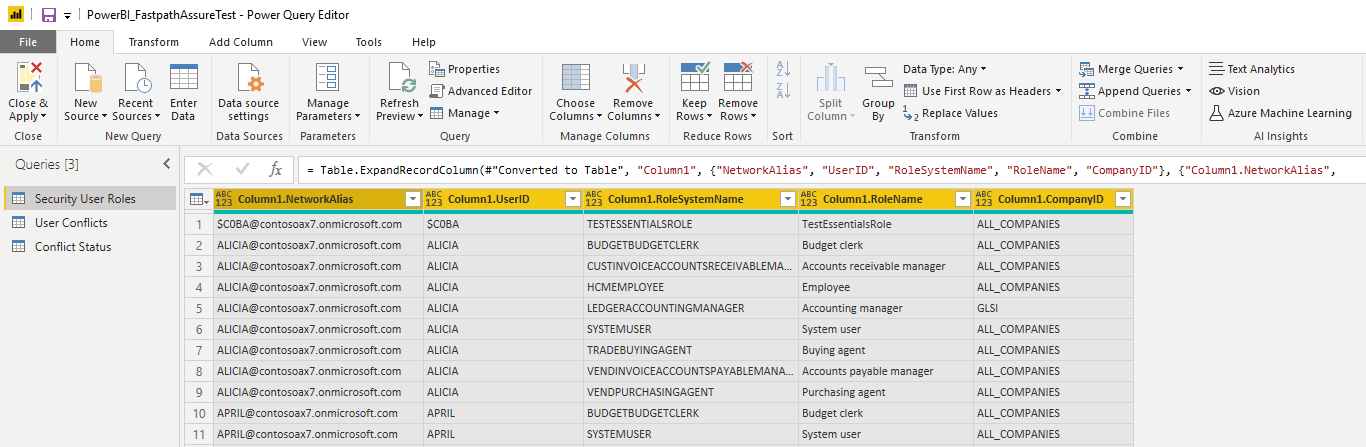
Finally we can see that the data is now in the format required where we can see the data for each column.
The reason we go through this process is because the endpoint we are using it utilized for all of our reporting, which means that the object being returned will be dictated based on the request we are submitting. If the endpoint you are utilizing is static and the data being returned is the same every time you do not have to perform the above steps.
So what did the above steps do to our query? Well we can see that we can see the steps we performed added the necessary Power Query logic to convert our report object to a table and the expand the object to the individual columns of the returned data.
Results in Power BI
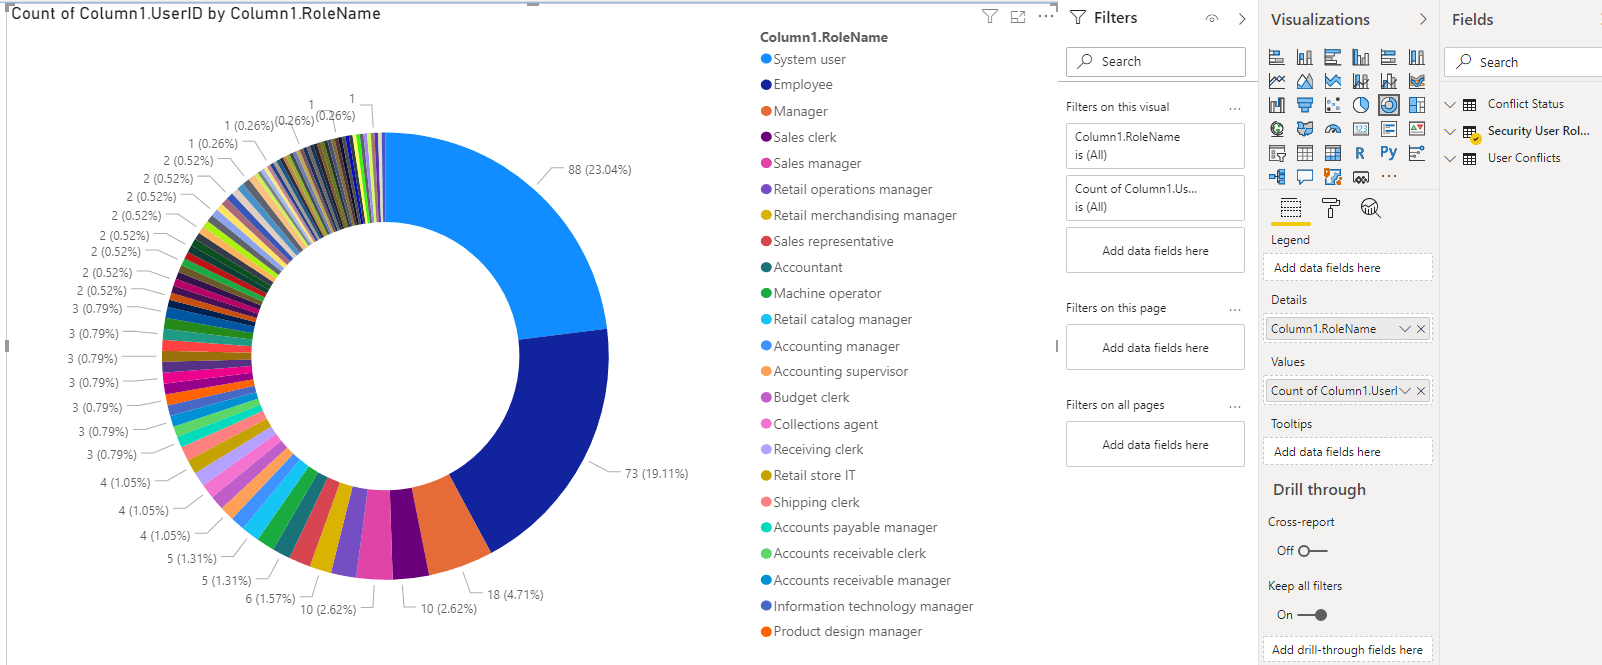
Once I save the custom query from above, I can now go and utilize this query as a data source for any Power BI visualizations.
Conclusion
So what features and functionality have we covered:
– How to consume data from a custom API endpoint
– Utilizing Power Query within the Power BI Advanced Query Editor to:
- Get an authorization token from an Azure AD app
- POST a HTTP request (with headers) from Power BI Advanced Query Editor to the custom endpoint
- Navigate the HTTP response to get to the actual data
– Dynamically getting the column headers from the HTTP response
I hope this helps show how to setup Power BI to consume custom API endpoints, as always if you have any questions feel free to reach out.