
Today, I wanted to write a slightly more development related blog post to talk about workspaces in Dynamics 365 for Finance and Operations. A workspace is the main navigational tool from the homepage of D365FO that serves as a ‘landing area’ for a business activity. A workspace is a type of form that has 3 separate sections: summary tiles, tabbed list, and related links. It can also include charts and Power BI elements.
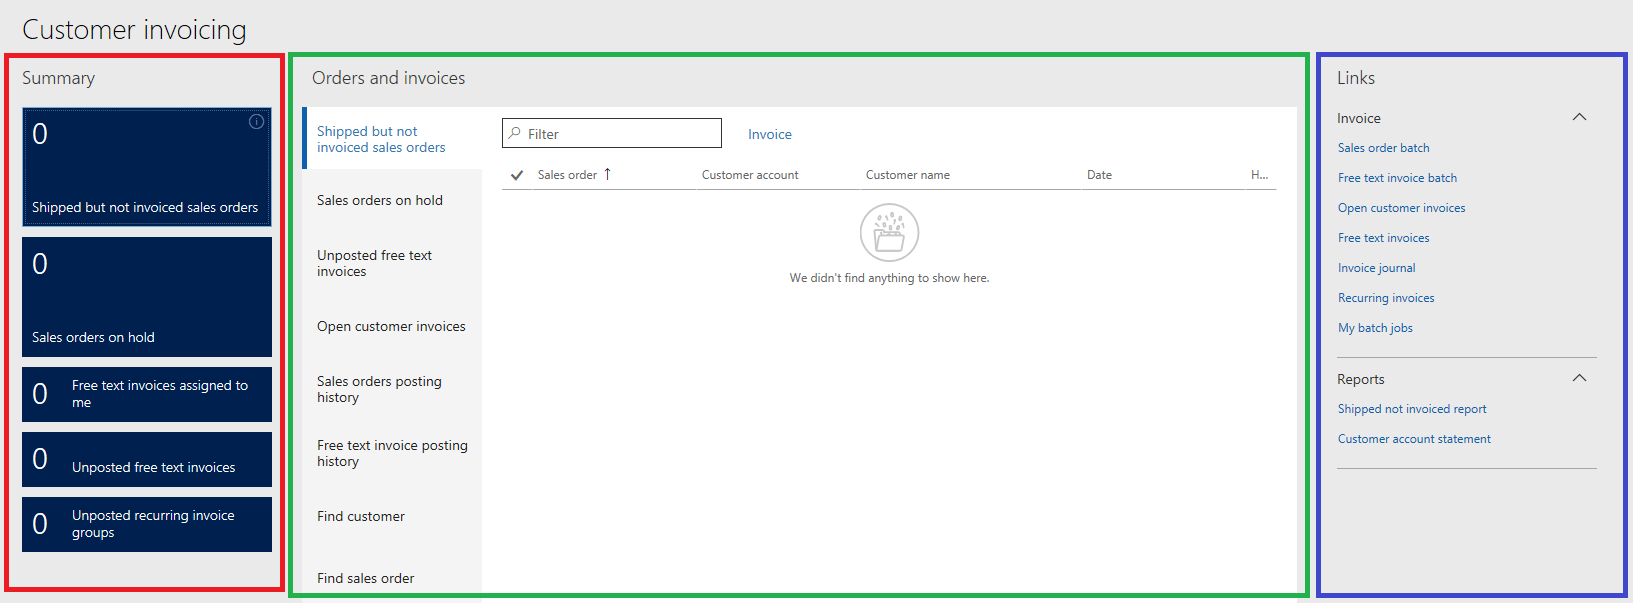
A workspace is launched from a new object called a tile, which is a clickable link that can be found when you log into the application. For example, if we look at a normal default dashboard for D365FO and find the Customer Invoicing tile and click on it, it takes you to the Customer Invoicing workspace.

The red area represents the summary tiles, the green area represents the tabbed list, and the blue area represents the related links.
The hierarchical overview structure of the different elements to create this is as follows:
- Default Dashboard
- Menu Item Extension
- SubMenu
- Menu Element Tile
- Tile
- Workspace (Menu Item Display and Form objects)
- Display Menu Items and Forms, for each section of the workspace
- Workspace (Menu Item Display and Form objects)
- Tile
- Menu Element Tile
- SubMenu
- Menu Item Extension
Each element of this needs to point to the layer below it to link this chain of objects together.
To programmatically create a workspace, here are the steps:
- Default Dashboard menu item extension
- From a new D365FO project, go to the Application Explorer and search for ‘navpanemenu’, this is the initial menu you are presented with when you log into D365FO
- Right click and go to Create extension
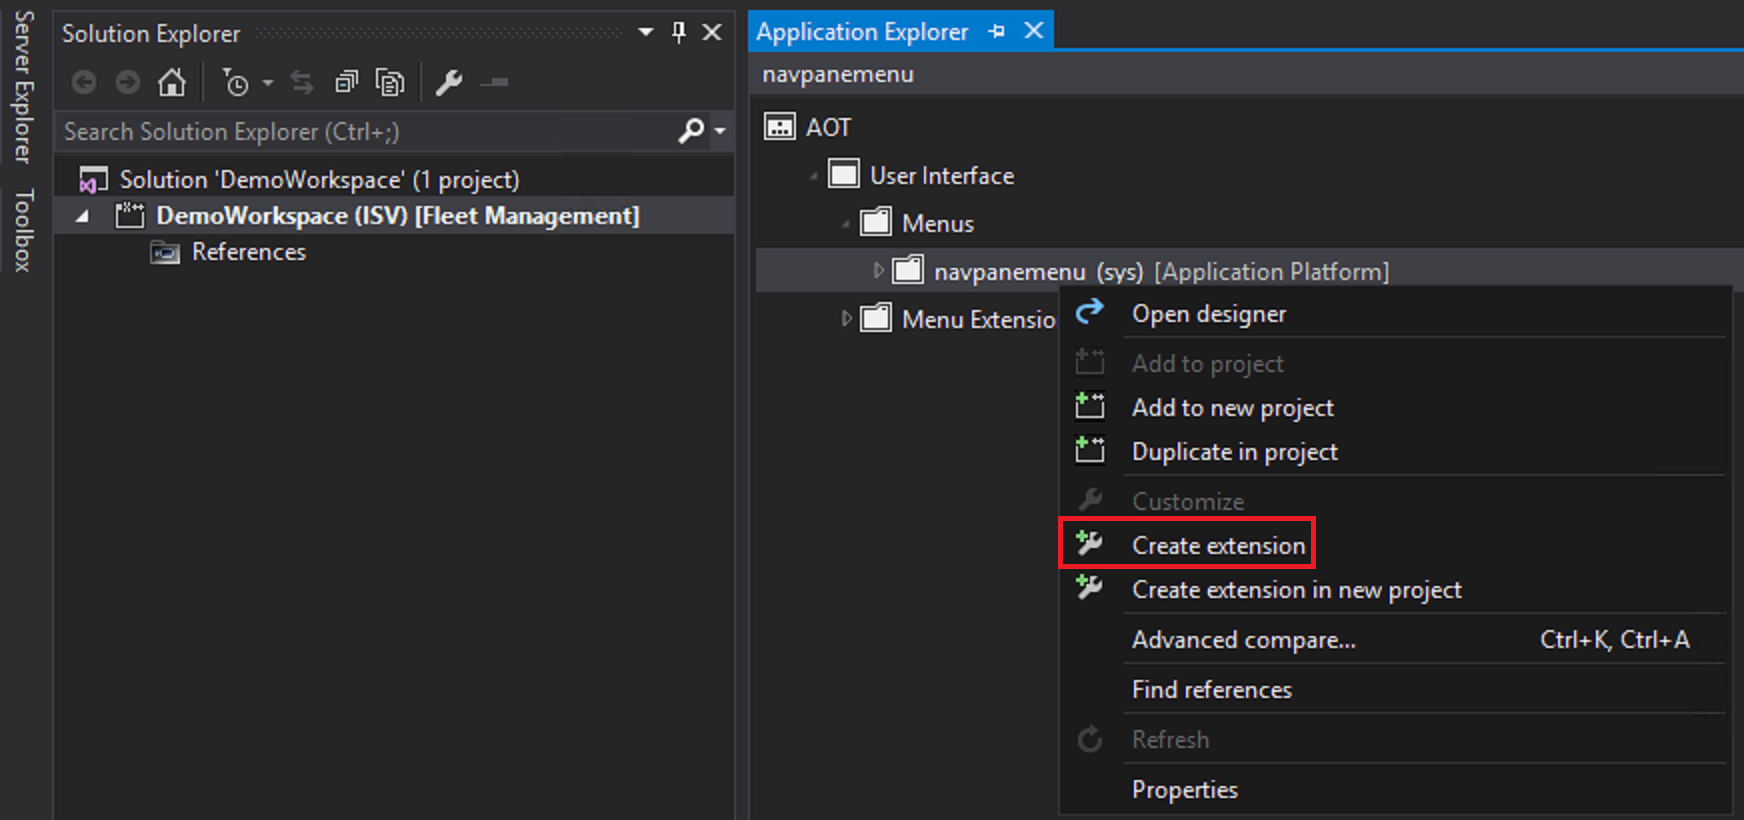
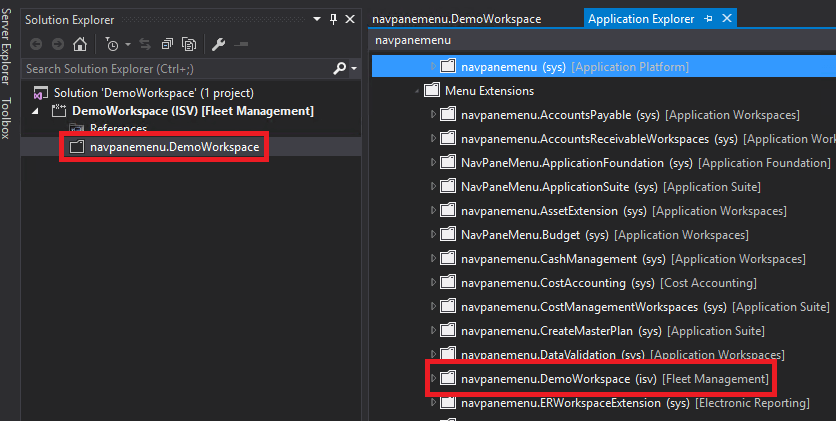
- Rename your extension to be in the format navpanemenu.<NameOfWorkspace>, once this is done, it will show up in the Menu Extensions section of your Application Explorer
2. Now Create the Tile, this will be the button that is clicked on the dashboard to launch your workspace
- You can specify an image that should be displayed as well as whether there will be a KPI available on the tile
3. Now open the Menu Extension in the designer, right click on the top level entry and go to New -> SubMenu, then on the SubMenu right click and go to New -> Menu Element Tile
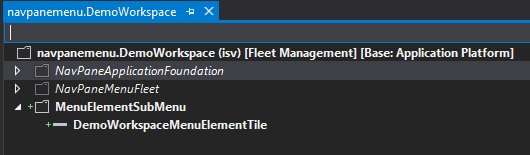
- Once created, in the Properties you will need to tell this Menu Element Tile object which Tile it is tied to
4. Create a menu item display and form for the workspace
- Once the menu item is created, be sure to go back to the Tile and point it to your workspace menu item
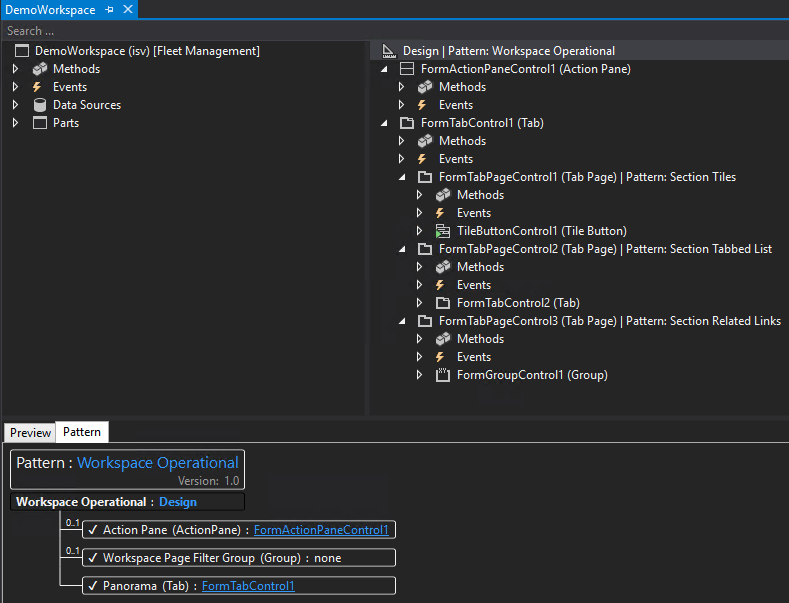
5. Open the workspace form, in the Design area, be sure you apply the Workspace Operational pattern by right clicking -> Apply Pattern -> Workspace Operational
- These patterns ensure your workspace looks and feels like other workspaces in the environment
- On the Pattern tab, in the bottom section, it will show what objects/items need to be added for the design pattern to be met. You will not be able to build the project until all requirements are met (there are quite a few objects that need to be added for this to build successfully, below is the bare minimum that need to be added).
6. Once you have completed all of previous steps, you will see your workspace on the default dashboard of D365FO.
The workspace functionality in D365FO is a great way to organize different business processes within the application and can be extremely powerful for end user efficiency and ease of use. Hopefully this guide helps in showing how to develop and use this feature.
Resources:
Superb site you have here but I was wanting to know if you knew of any forums that cover the same topics discussed in this article? I’d really love to be a part of community where I can get comments from other experienced people that share the same interest. If you have any suggestions, please let me know. Thank you!
Darrel,
I would look at Dynamics Communities they are a great resource of information surrounding all types and versions of Dynamics and have numerous user lead conferences throughout the year, many of which I present at.